Cloning also known as asexual propagation is the process of growing a new plant by cutting off a piece from a parent plant and duplicating that plant in a separate pot. Gardeners do this cloning/cutting methods to quickly reproduce plants with desirable traits. For instance you may have a tomato plant that has incredible yields, is pest resistant, grows compact, and/or is a fast grower compared to all other of the same family.
People clone plants because they want to keep the good genetics of a particular plant. You might grow 10 plants from the same seed source yet one of those seeds just grows that much better. So, wouldn’t it be nice to keep that plant around for years instead of starting 10 more seeds and hoping you get another super seed?
No, cloning your plant is not DNA manipulation, nor does it require a high tech lab. It takes patience, cleanliness, and the acceptance that sometimes a variety of plants maybe harder to clone than others. I have learned to clone many types of plants through practice over the years, and every now and then you just one plant that despite its superior qualities it takes forever to grow roots and establish its self or requires extra care just to get started. For most of our readers out there however by following some basic instructions. You should be able to get at least to the 90% success range your very next go!
The following section will go over a simple method of cloning soft stem plants. When you are cloning plants you are reversing its naturally psychology to grow new leaves and instead focus on shooting out roots.
Note: this method will work for plants that don’t have hard bark and have regular interval nodes. Plants that made of bark such as trees, require grafting, other plants that don’t have regular internodes such as orchids, sometimes require other cloning methods, but we will cover those another time.
Before we get started lets go over the rules of thumb:
The parent plant must be healthy, pest free, and thoroughly watered before cutting clones.
If you are a beginner you might want to take more clones than you need because your success rate maybe lower
New growth is the best place to take cuttings. Old growth doesn’t have as much energy or hormones being directed to it so it is less likely to root.
You will be cutting you clone twice. The first cutting is to get it off the plant is made extra long (about 6″), your final cutting will be taken under water, at a 45° angle to keep an air embolism from killing it, and will be no longer than 4″.
Your clone environment must stay consistent. No fluctuations of temperature or humidity, 24hours of light is even recommended.
Avoid cutting off more than 35% of your parent plant, it could cause a lot of stress to it.
Materials:
Making Your Cuttings Step by Step:
Lay out your cutting area with the parent plant, two plastic cups filled with clean water, shot glass of cloning gel, and the medium (rock wool, ready grow, etc.). You want to be somewhat timely doing this so don’t start cutting and not have everything setup.
Take extra long cuttings from the healthiest fastest growing parts of your plant, 5 at a time, and immediately put them in the first cup. Try to use branches that you would have to remove anyways so you don’t cut major fruit bearing branches.
One by one move them to the second cup and do your final cutting beneath a node and into the gel for 15-30 seconds. Your cutting should be about 4″ long at this point. Nodes have some of the highest growth concentrations so be sure good service area is exposed here. Some people shave a little of the outer skin to give more exposed rooting area. The idea is when you dip into gel or solution the chemical is absorbed into the tissue triggering a hormonal response to produce roots.
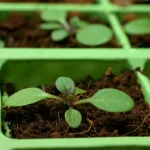
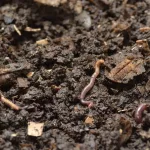
Place plants in your moistened media, but the media should not be soaking. If you squeezed the rock wool, or plug, a small dribble of water should come out, so don’t let your cuttings ever sit in water!
Cut off most leaves leaving at most 2-3 leaves at the top, you may even cut these in half. The reason is your new cutting doesnt have roots, and therefore has a hard time transporting water and food to keep the turger pressure in the leaf tissue. Cutting back the leaf helps the plant by not burdening it with feeding leaves, and lets it focus on making roots.
Mist the plants down with the spray bottle, cover with a dome, and place under 24hr fluorescence in a room that will stay around 78º. Mist daily and keep root zone moist. Check every 4 days for roots. Once rooted they are ready to start a light feeding and transplanting.
Product Categories
Categories
 Shear | Trimming
 Grow Environment
 Hydroponics | Water Treatement
 Containers | Support
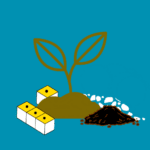 Substrates
Check out all our Product and paid resources